Here is a link to Time Magazine: Light Box
LIGHT BOX
I was looking at an article on here this morning that was a perspective about the ethical place of a photographer. The question was if a photographer should intervene when they are witnesses to violence. Look Here INTERVENE
My personal opinion on this matter is a simple one. If you don't have the means or training on how to deal with situations that have elevated to violence DO NOT intervene or you will most likely also become a victim.
You may one day find yourself in a situation where something of this nature happens around you and your lens may become the best weapon that you have.
Be safe. Be invisible.
Thursday, February 28, 2013
Friday, February 22, 2013
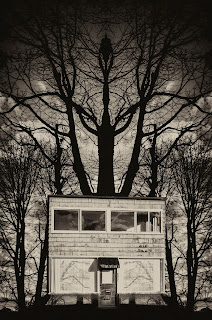
A couple that i liked from photography class, CopyCat assignment.
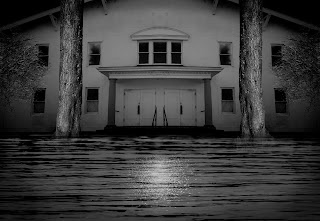
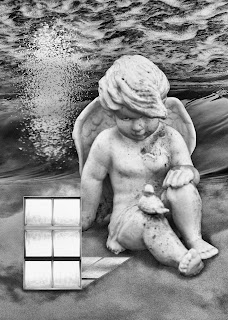
These are done for an assignment that i had for my digital photography class at PCC. It was a lame attempt at trying to mimic are truly amazing photographer and artist of his craft, Jerry Uelsmann.
Mind you everything i did was with digital and Photoshop. Jerry accomplishes this by the means of darkroom only. Click his name and pay homage to the master.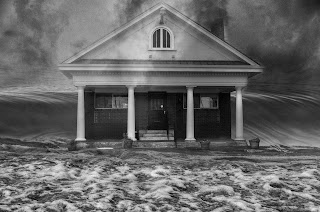
Mind you everything i did was with digital and Photoshop. Jerry accomplishes this by the means of darkroom only. Click his name and pay homage to the master.


HDR Toning
If you have a fancy camera you may have the ability to take an HDR photo with a setting included but it isn't needed because you can do this manually on your own. HDR, stands for High Dynamic Range. In short, the camera takes three images of the same shot (tripod most likely needed) with each shot being bracketed, one normal, one +1, and the other -1, to make 3 EV steps and then merges them with software on your camera. This method can be achieved manually also by taking the shots bracketed and then merging them in Photoshop with their cool little HDR software later. It's a nifty little effect and always leaves people scratching their heads, wondering, "how did you do that?" Well, since we all have digital cameras that can take endless amounts of photos i figure, what's stopping you from trying?
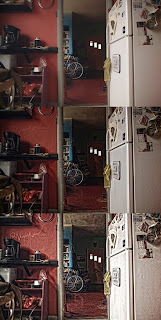
This is several steps using Photoshop6. Each step i brought out more range of the HDR photo trying to achieve a surreal, almost cartoon, kind of look.
This is the completed photo. Here is a link to a short YouTube tutorial on the subject. YouTube Tutorial for Photoshop

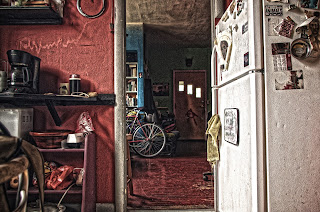
This is several steps using Photoshop6. Each step i brought out more range of the HDR photo trying to achieve a surreal, almost cartoon, kind of look.

This is the completed photo. Here is a link to a short YouTube tutorial on the subject. YouTube Tutorial for Photoshop
Brenizer Method
Today i would like to bring to your attention a photography method only able to be achieved because of modern technology. It's called the Brenizer Method.
What this technique makes possible with our cameras is shallow depth of field but with a wider field of view using multiple images stitched together in Photoshop. Essentially it is a panorama but the background will be out of focus because of the shallow depth of field.
1) With a wide aperture set, take multiple pictures of your subject/s starting from the center and moving outward.
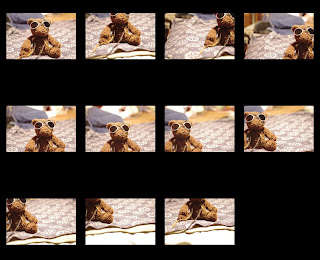
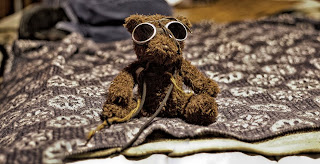
Here i used a teddy bear as my subject just to keep it simple. I don't have the time to screen capture the whole process of stitching images in Photoshop so at the end of this post i will have a YouTube video tutorial link available for you to view.
2) Stitch the photos in Photoshop and adjust your image to your liking. The photomerge in Photoshop is found under, File>Automate>Photomerge.
At first glance it doesn't look like much has changed but this image would not have been possible without this technique. Follow this link to view a short photoshop tutorial on the subject if you like what you see.
BRENIZER METHOD TUTORIAL
Today i would like to bring to your attention a photography method only able to be achieved because of modern technology. It's called the Brenizer Method.
What this technique makes possible with our cameras is shallow depth of field but with a wider field of view using multiple images stitched together in Photoshop. Essentially it is a panorama but the background will be out of focus because of the shallow depth of field.
1) With a wide aperture set, take multiple pictures of your subject/s starting from the center and moving outward.

Here i used a teddy bear as my subject just to keep it simple. I don't have the time to screen capture the whole process of stitching images in Photoshop so at the end of this post i will have a YouTube video tutorial link available for you to view.
2) Stitch the photos in Photoshop and adjust your image to your liking. The photomerge in Photoshop is found under, File>Automate>Photomerge.

At first glance it doesn't look like much has changed but this image would not have been possible without this technique. Follow this link to view a short photoshop tutorial on the subject if you like what you see.
BRENIZER METHOD TUTORIAL
All The Things...
I have decided to start making this blog about more than just Nostalgia (our band) and start to just make it about everything i do also.
I have so many things that i have been doing that i would like to share. Painting, drawing, music, and photography are some of these things that i would like to start to share on Light Year Mind Theory.
Keep your eyes peeled and your ears pealed.
I have so many things that i have been doing that i would like to share. Painting, drawing, music, and photography are some of these things that i would like to start to share on Light Year Mind Theory.
Keep your eyes peeled and your ears pealed.
Subscribe to:
Posts (Atom)